Contract Billing Software Tutorial
Getting Started
Clients record management

Before you can create invoices for a client, the client record must first be added to the system. You will then select the client from the list of existing clients when associating it with a new invoice.
To add a client record, click the Add button, enter the required client information when prompted, and then click OK to save the new client record.
To update an existing client, select the client record from the grid, click the Edit button, modify the client information as needed, and then click OK to save the changes.
To delete a client record, first ensure that the client has no associated invoices. Navigate to the Invoices screen and filter by the client to check whether any invoices exist. If no invoices are found, return to the Clients screen, select the client record from the grid, and click the Delete button to complete the deletion.
Creating Invoices and Timesheets
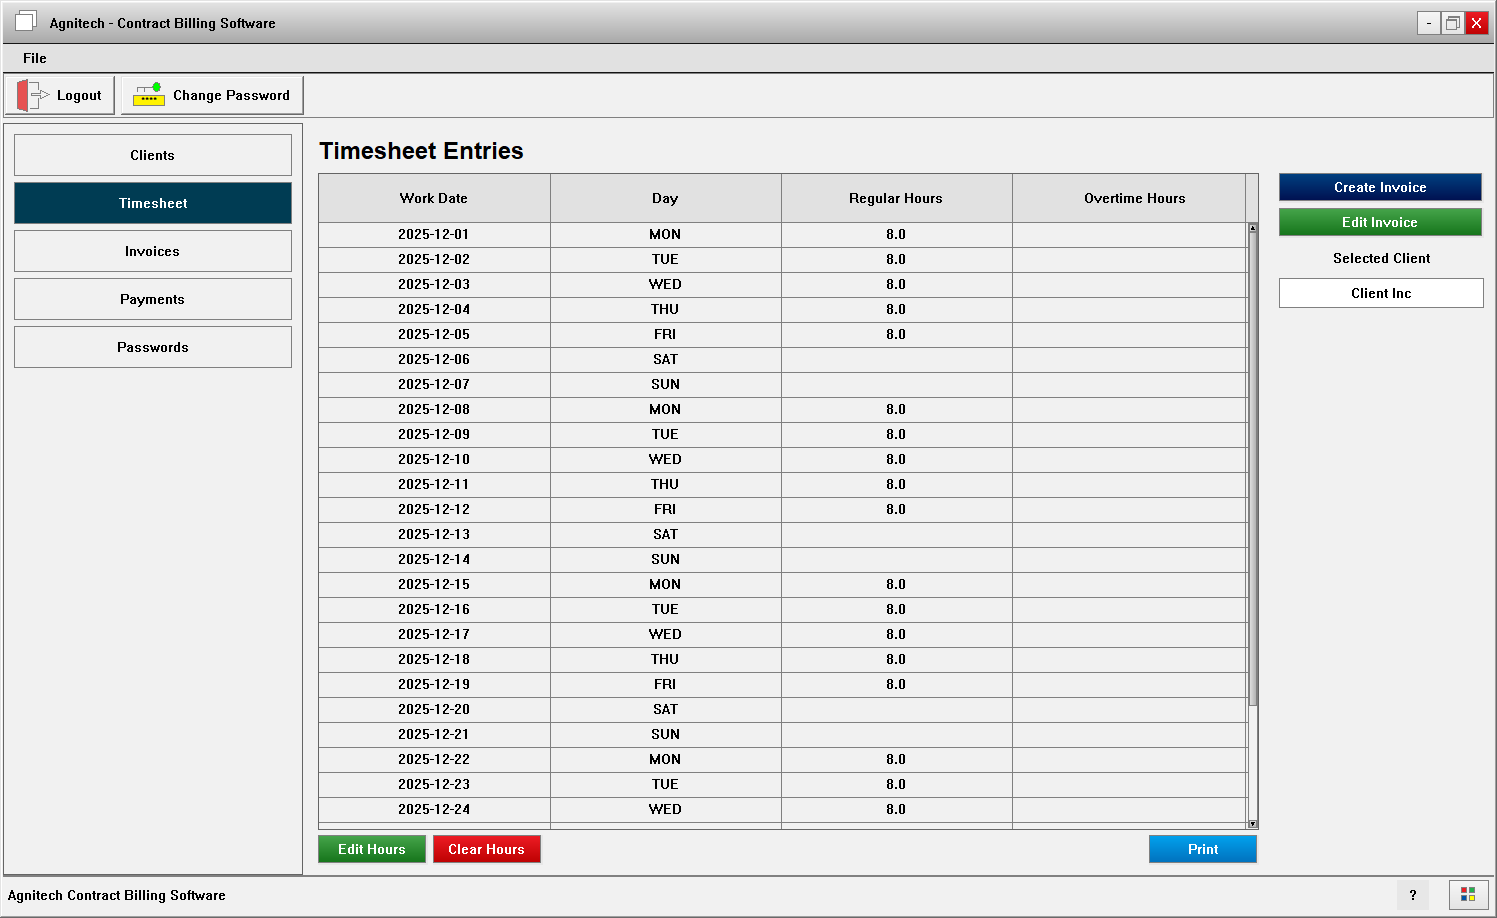
Timesheets are not created manually; they are automatically generated by the system when an invoice is created. To create an invoice, click the Create Invoice button on the Timesheet screen. You will be prompted to enter the invoice details, including the client, the billing period covered by the invoice, and the applicable billing type (Fixed or Hourly). If the billing type is Fixed, you will enter the fixed amount to be billed for the invoice. If the billing type is Hourly, you will enter the regular and overtime hourly rates, and the system will automatically calculate the total billable amount.
Once an invoice is created, a corresponding timesheet is automatically generated for the dates within the invoice’s start and end range. To enter or update time, double-click a timesheet entry and specify the regular and overtime hours spent on the project for that day. Your changes are saved automatically when you click OK in the Timesheet Entry popup.
An invoice can be generated and printed for the selected timesheet by clicking the Print button. A preview popup will be displayed, from which you can click Print to print the invoice. You may also select a PDF printer if you prefer to save the invoice as a file instead of printing a hard copy.
Note: If the invoice spans over two months, it will be printed in a line-item format. If it’s for a single month, the invoice will be displayed in a grid format, showing the week and days of the week, with the total hours listed below each day.
Viewing Invoices
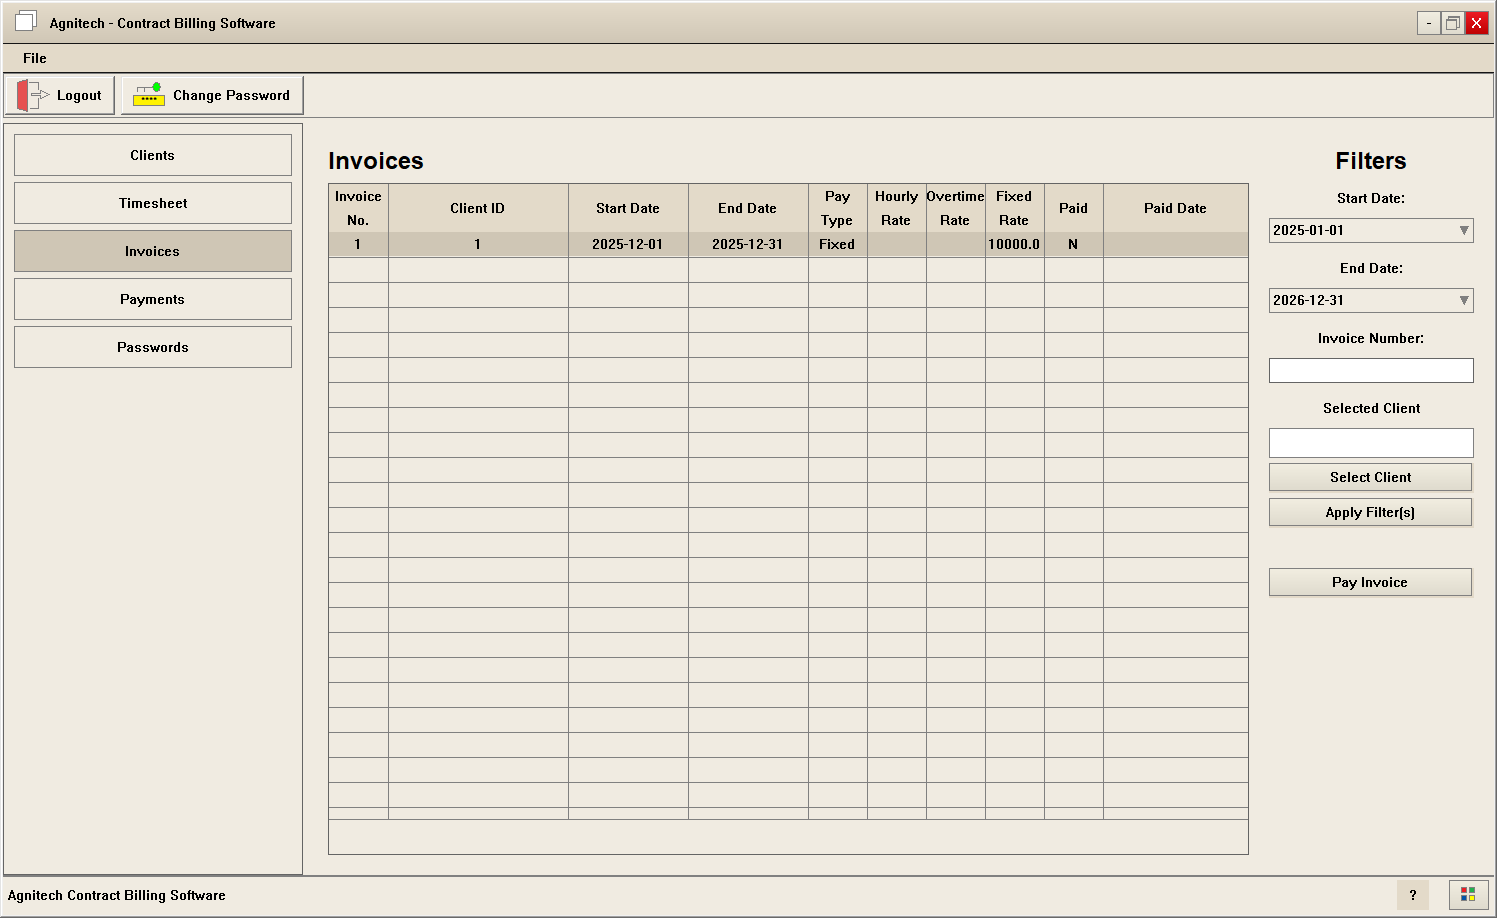
You can view invoices by applying filters on the Invoices screen to narrow down the displayed list. Available filters include start and end dates, invoice number, client, and payment status. You can apply any combination of these filters—or none—and then click Apply Filters to view the results.
To post a payment for a specific invoice, select the invoice from the list and click the Pay Invoice button. This will post the payment and mark the invoice as paid.
Viewing Payments
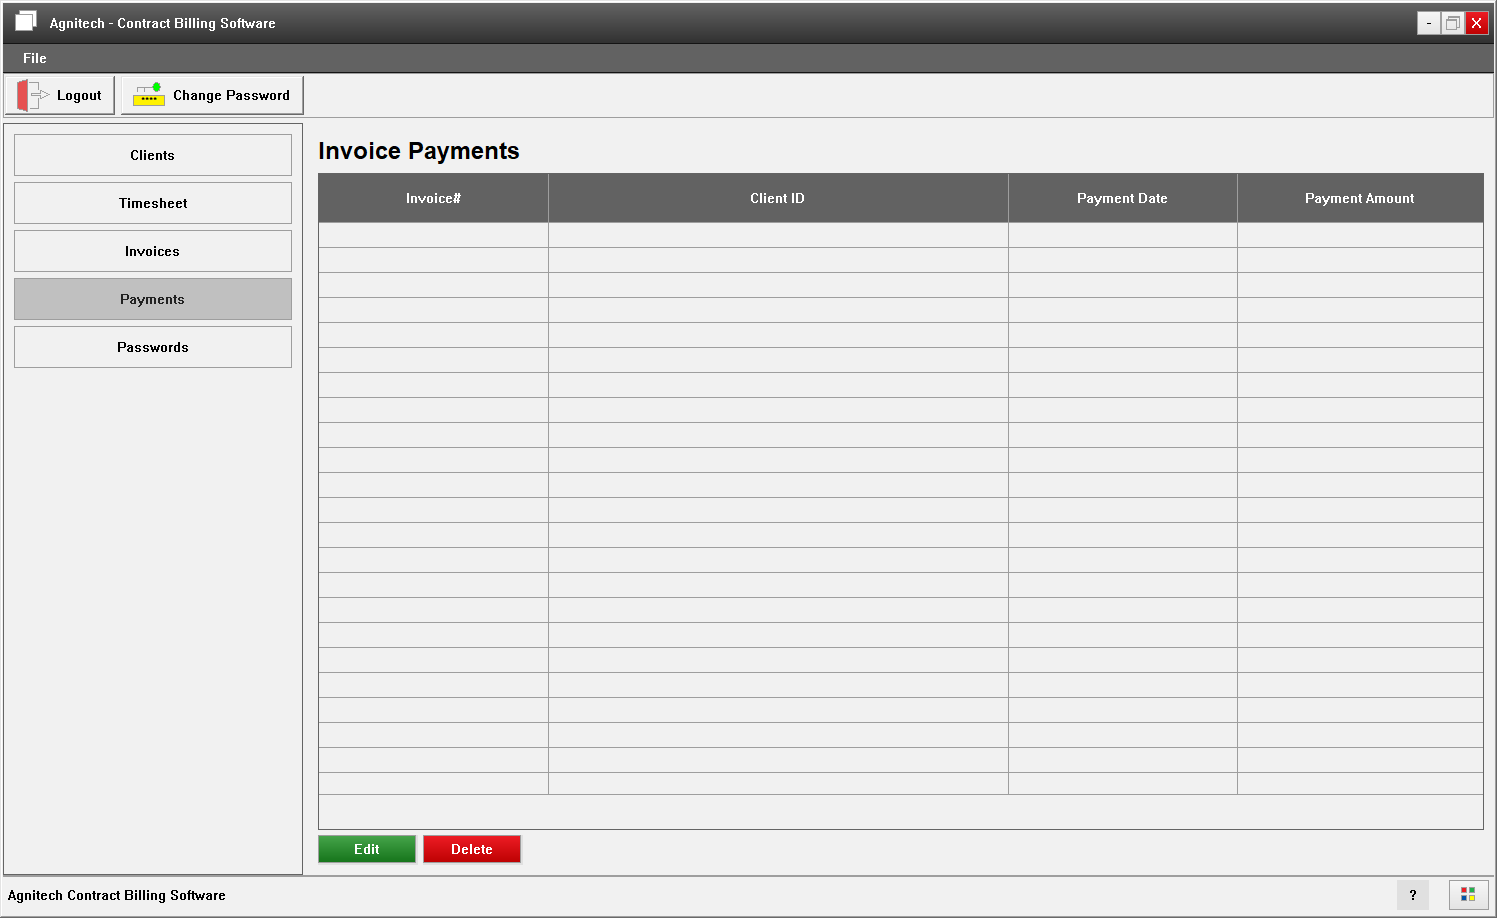
You can view all received payments on the Payments screen. To delete a payment, select it from the list and click the Delete button. Once a payment is deleted, the associated invoice will be marked as unpaid.
Password Management
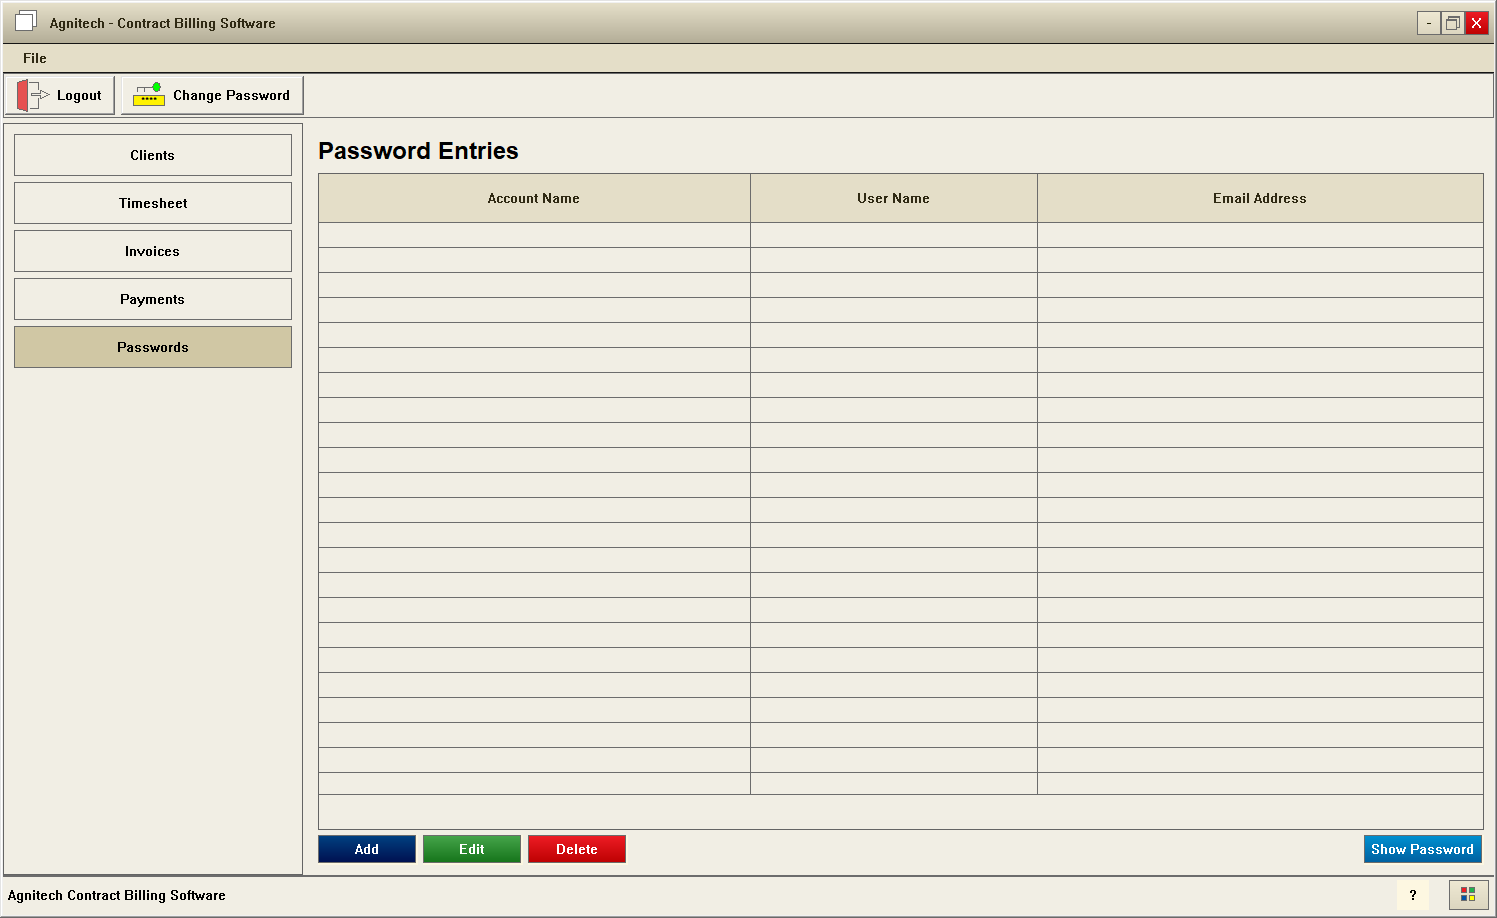
To add a new account password, click the Add button, enter the required account information when prompted, and then click OK to save the new password record.
To update an existing account, select the account record from the grid, click the Edit button, modify the account information as needed, and then click OK to save the changes.
To delete an account, select the account record from the grid, and click the Delete button to complete the deletion.
Note: The Passwords screen does not automatically display account passwords. To view the password for a specific account, select the account from the list and click the Show Password button.